Project Educate
Welcome to a step-by-step tutorial addressing how you should be writing your article for projecteducate! Please read carefully through this article, and closely observe each screenshot so that you can have a good understanding on how to proceed as you publish what might be the first of many PE articles!
Step 1: You're on DeviantArt, possibly wondering what "sta.sh" is and where you can find it.
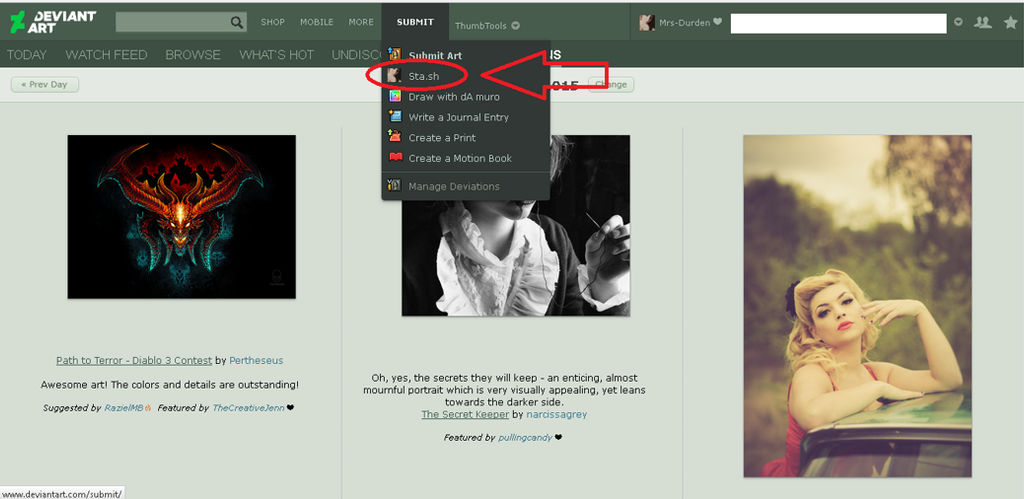
Step 2: Hover over that big "Submit" button, and you'll find a few drop-down options. One of them is sta.sh! Click on it.
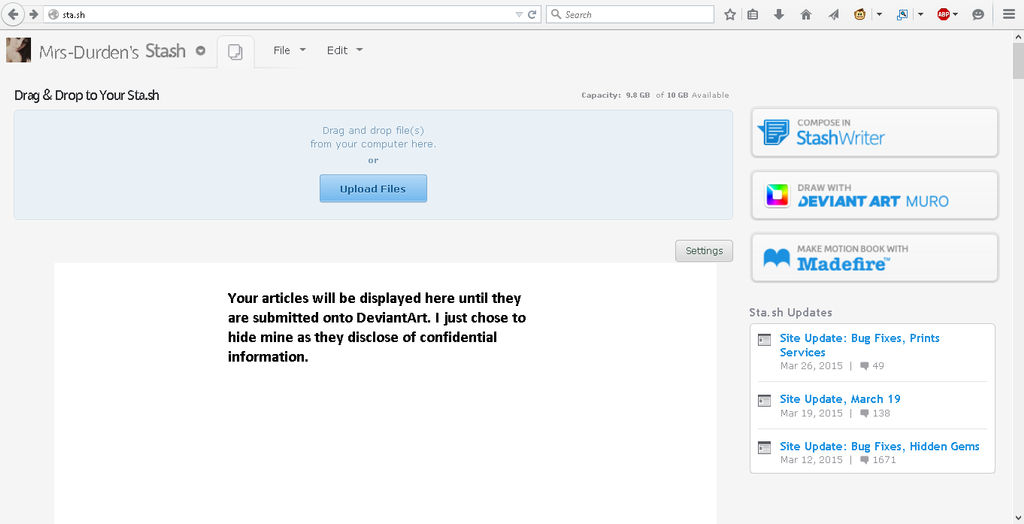
Step 3: You've clicked on sta.sh, and now you're seeing this page. As you can see, there are many options. The one you're looking for is "Compose in StashWriter"
Step 4: You've clicked on "Compose in StashWriter" and now you're seeing this page. This is where you write your article!

Step 5: Before you start writing, go ahead and select a skin for your journal! In this case, look to your right, click on "Change skin" and you will see the options "Installed" and "Groups." Click on "Groups" and you will find projecteducate!

Step 6: The skin you choose will depend on what week you are writing for! For example, if you're writing for Community Week, click on the Community Week Skin. If you're writing for a week that does not have its own skin simply use the PE 2019 skin (at the very bottom of the list). After you've clicked on it, you'll notice that BAM your article has an awesome skin displaying! Now, click on "Edit" and select "Switch to HTML Mode."
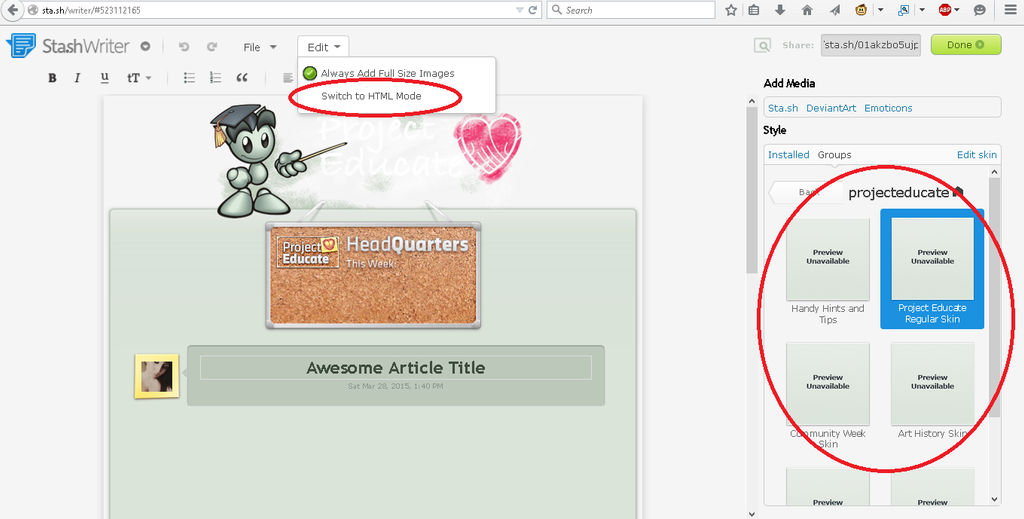
Step 7: After you've switched to HTML mode, it's time to include a very important HTML tag into your article! Look carefully at the photo below to see the code I am talking about. You will also have seen it in the guidelines we've linked you. This tag MUST be at the beginning of your article, as displayed here, with your article's actual text beginning after it. Your week title could be Community Week, Art History Week, Artists' Toolbox Week, etc etc.
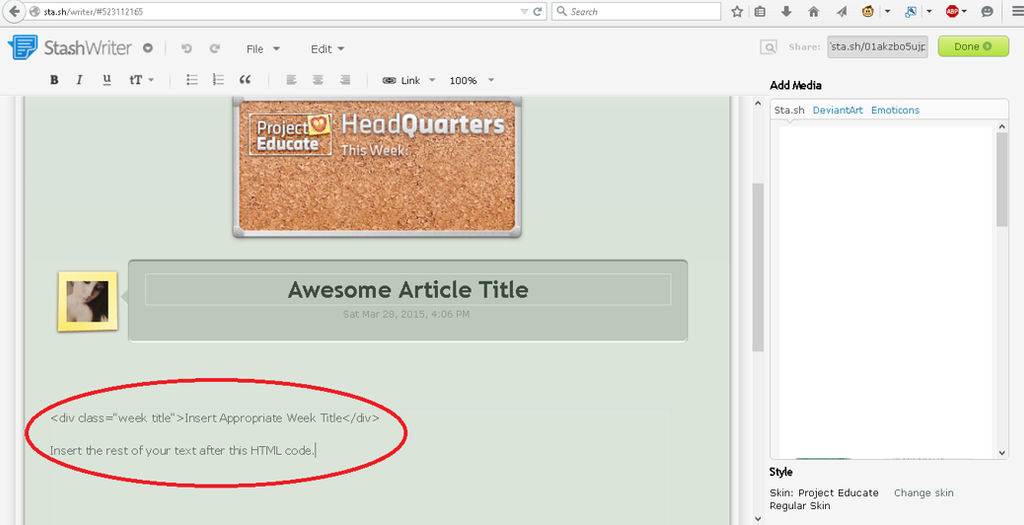
Step 8: When you hit "Done" you will see your week title display in the skin's little box header. This is how you tell if your HTML code worked or not. You can also see that the rest of your text is properly being displayed.

Step 9: Now it's time to hit that "Submit" button. Which will lead you to this page. Every detail of this page is important when scheduling an article for PE!

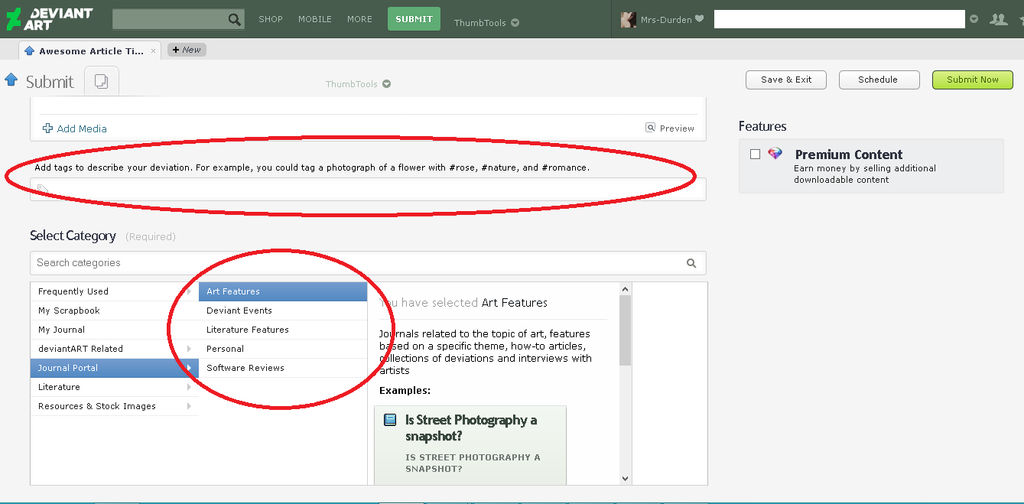
Step 10: First, be sure you add appropriate tags to your article, and select the proper category to describe it.
Step 11: Then, under "Submit to Groups" select projecteducate! After that, click on "Schedule" and select the appropriate date and time! *IMPORTANT* the time you choose will be in YOUR time zone, however, all PE articles are scheduled based on L.A Time (PST). Please find a time converter to make sure you select a time in the A.M or P.M as needed for your article.
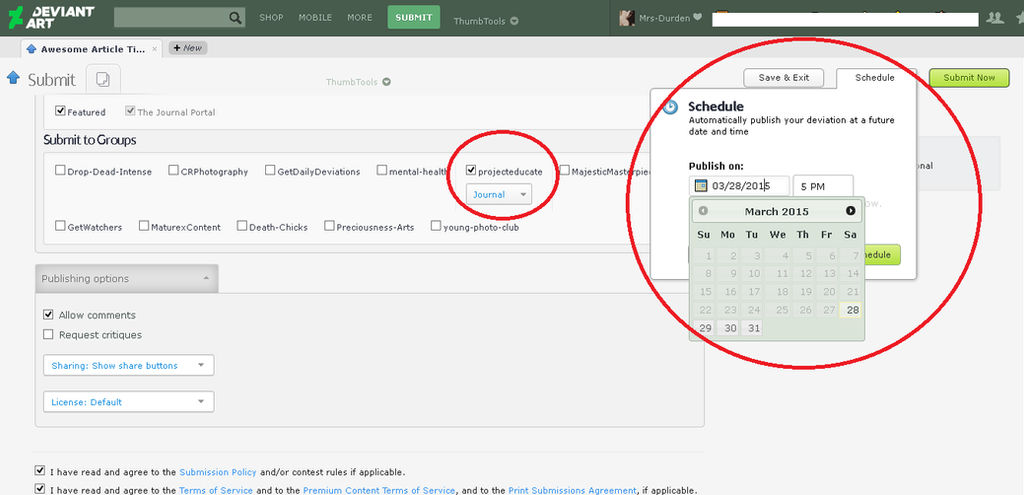
Step 12: Once you've selected a date and time, the Schedule widget will give you an approximate estimation of when your article will be published, i.e: 4days from now, 4hours from now, etc. It will also tell you what time and date it currently is, which is a good reminder to you that the scheduler is in your time zone.
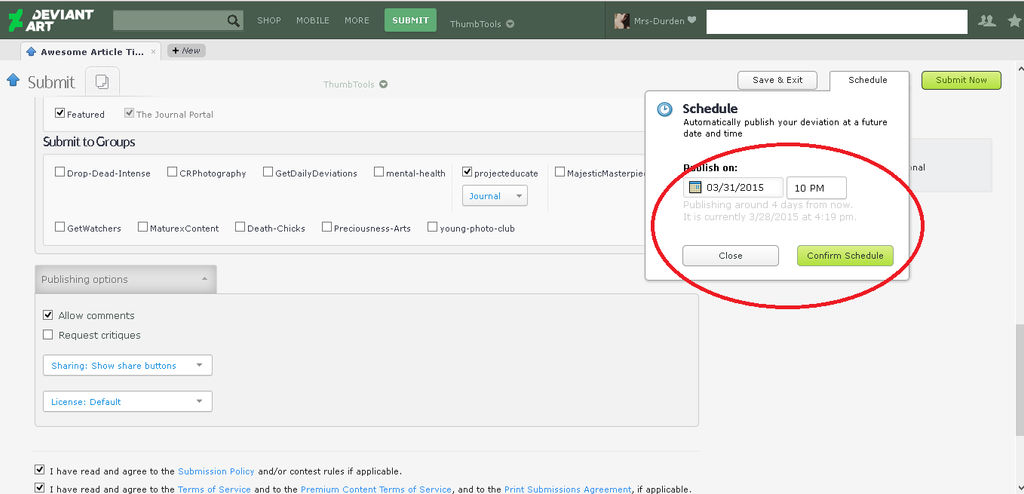
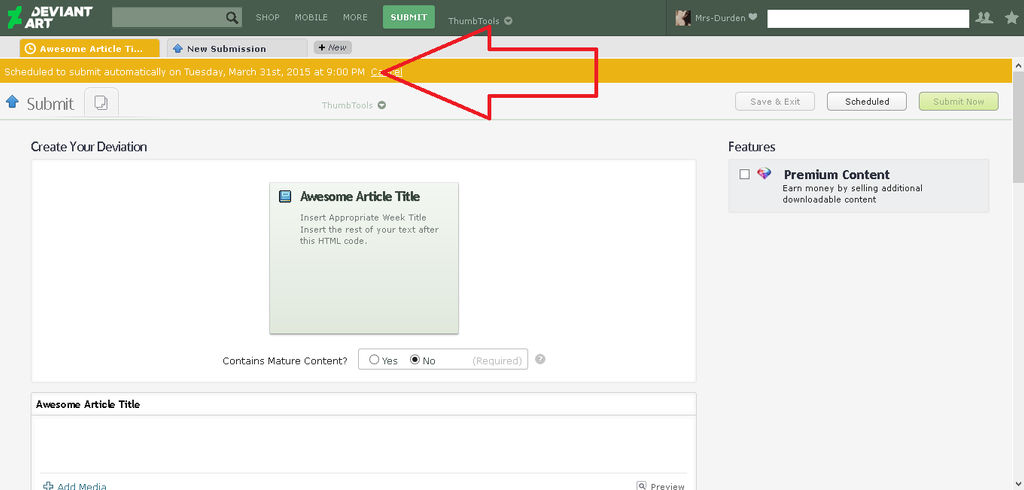
Step 13: Once you hit "Confirm Schedule" you're good to go! You'll see this page, where you can double check that you properly scheduled your article!
